 Darktide HQ — Season 1
Darktide Crystal
Equip crystal dice (six slots by floor 41) and climb the headquarters. In every room you roll the dice, they form a poker hand, and its multiplier is multiplied by the face value to deal damage. Clear a room and pick 1 of 3 bonuses to pump the hand you are building.
This is the Season 1 dungeon. Open the previous version →
The random-armour boxes below roll Individual Armor pieces — what that system is
Best loadout
Solved with a simulator built on the game's own formula: result = Face Multiplier × Combo Multiplier. The combo decides it — Six of a Kind pays a base of ×360,000, twelve times any other six-dice hand, and dropping to Five of a Kind cuts the result about 15-fold. So the loadout first makes six ③s a certainty, and only then scales the multiplier. On floor 141+ (6 dice, 6 rooms, 6 slots, every crystal at grade 20) it lands ×27.7M: face ×26.6, combo ×1,041,200.
 Six of a KindDice 6 · slots 6 · rooms 6 · grade 20 crystalsBuild multiplier: ×27,695,920
Crystals only, with a 120-second run per floor. In the fight the floor buff (for example +10 to the base of every ③ die on a floor with that daily face), room bonuses (+500 to the combo multiplier per such pick, up to 5 per floor) and extra rerolls stack on top, so the in-game total can be higher.
Face ③: the only pip both face crystals pay their red side on (Face Boost I takes 1/2/3, Face Boost II takes 1/3/5), and the higher of those two pips.






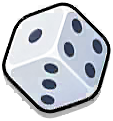
The slots form a ring around the die altar, numbered continuously: I–III down the left arc, III and IV at the bottom, then IV–VI back up the right one. Booster adjacency goes by slot number and matches the ring.
- IFace Boost IThe main source of face value: +3 to the base pips of every face per die showing 1/2/3, another +20 to total face value per such die after every room cleared, plus +10 face and +500 combo per die at grade 20. It sits on slot I, under the left booster, so its red values run at +6.
- IILeft-Side BoostBooster. Gives the crystal on its left +3 to every red value (face value) and ×2 to every green one (combo multiplier); from slot II it adds a further +3 and ×1.5 — +6 and ×3 in total. Half of that only works from the second position: the config spells the slot out as a condition.
- IIIReroll BoostThe reroll bank: +3 rerolls per room, +2 every 30 seconds and a 30% chance not to spend a reroll — about 64 per floor against the ~45 you need. On top of that, every reroll spent adds +50 combo and face value, up to 99 stacks.
- IVFace Boost IIThe second face crystal: the same thing, but on odd dice (1/3/5) — on ③ it pays alongside the first. It takes slot IV: both boosted slots already went to crystals that gain more from the boost.
- VRight-Side BoostThe mirrored booster: it lifts the crystal on its right, i.e. slot VI. Its extra grade-15 and grade-20 rungs only fire from slot V.
- VIRoom Boost IThe loadout's biggest multiplier. At grade 20 it raises the hand's BASE multiplier by +10% per room cleared, and the right booster triples that — +30% per room, i.e. ×2.8 over six rooms. On top of that, +1000 combo and +3 rerolls per room.
What breaking the layout costs (same conditions, ×27.7M = 100%): boosters off slots II and V — ×22.5M (−19%); Room Boost II instead of Room Boost I on slot VI — ×12.3M (−56%); landing five of a kind instead of six — ×1.8M (−94%). Face value and combo multiplier are not worth the same: +1 face is +1% of the face multiplier, while +1 combo is a fraction of a percent of the 360,000 base. So the only green effects worth a slot are the ones that multiply that base or tick up per room.
Six of a Kind is assembled by rerolling INDIVIDUAL dice, which unlocks only once every equipped crystal has reached grade 10 (before that you reroll 1–3 dice and the hand is all but unreachable). Without Combo Change III a ③ comes up on 17% of rerolls, so locking the hand takes about 45 of them — which is exactly what the reroll bank on slot III is for.
Up to floor 140 the crystal grade is what the boxes on those floors drop. From floor 140 on, dice, slots and rooms no longer change and the grade depends on your upgrades, so you pick it yourself. Layouts are computed by a simulator using the game's own formula, with a 120-second run per floor.
How damage is built
- The Face Multiplier is the summed pip value of the rolled dice (plus face boosts), converted into a multiplier. Higher faces mean more.
- The Combo Multiplier depends on the poker hand you form: the stronger it is (up to Six of a Kind on six dice), the higher the multiplier.
- At the start the multiplier is ≈1 and the combo is random. Multipliers accumulate over the run: every cleared room offers a choice of 1 of 3 buffs, one of which boosts a specific combo or face.
Dice poker combos
19 hands, weakest to strongest — dice poker. The right column shows the smallest roll that forms each one.
| Combo | Dice | Multiplier | Example |
|---|---|---|---|
| High PointAll five dice show different faces in random order | 1 | ×1 |  |
| Two StraightTwo dice with faces in consecutive order. | 2 | ×2 |  |
| One PairOne pair of dice has matching faces | 2 | ×4 | |
| Three StraightThree dice with faces in consecutive order. | 3 | ×6 |  |
| Three of a KindThree dice have matching faces | 3 | ×24 | |
| Two PairsTwo pairs of dice have matching faces | 4 | ×32 |  |
| Four StraightFour dice with faces in consecutive order. | 4 | ×40 | |
| Two Running PairsTwo pairs of dice have matching faces, and are in consecutive order. | 4 | ×96 | |
| Four of a KindFour dice have matching faces | 4 | ×480 | |
| Full HouseThree dice have matching faces, plus another pair match a different face | 5 | ×240 | |
| StraightFive dice with faces in consecutive order | 5 | ×300 |  |
| Five of a KindFive dice have matching faces | 5 | ×12,000 | |
| Three PairsThree pairs of dice have matching faces. | 6 | ×1,200 | |
| Two TriplesTwo sets of Three of a Kind with different faces. | 6 | ×3,600 | |
| Four with a PairFour dice have matching faces, plus another pair match a different face. | 6 | ×4,800 | |
| Three Running PairsThree pairs of dice have matching faces, and are in consecutive order. | 6 | ×6,000 | |
| Two Running TriplesTwo sets of Three of a Kind with consecutive faces. | 6 | ×21,600 | |
| Six StraightSix dice show different faces in random order. | 6 | ×30,000 | |
| Six of a KindSix dice have matching faces. | 6 | ×360,000 | |
Room buffs add +to the base multiplier of a chosen combo, so it pays to build the whole run around a single target combo.
Per-floor progression
The deeper you go, the more dice per roll, rooms per floor and crystal slots you get — the six-dice hands only become possible near the top.
| Floor | Dice | Rooms | Slots | Buff groups |
|---|---|---|---|---|
| 1+ | 2 | 4 | 4 | — |
| 11+ | 2 | 5 | 4 | — |
| 21+ | 3 | 6 | 5 | 1 |
| 41+ | 4 | 6 | 6 | 2 |
| 61+ | 4 | 6 | 6 | 3 |
| 81+ | 5 | 6 | 6 | 3 |
| 101+ | 5 | 6 | 6 | 4 |
| 141+ | 6 | 6 | 6 | 5 |
Floor mechanic
Each floor carries a rotating set of modifiers — some boost combos/faces, some cut them. Check them before entering.
Buff & debuff list(32)▾
 When the Combo is High Point, base Combo Multiplier +5When the Combo is One Pair, base Combo Multiplier+5When the Combo is Two Pairs, base Combo Multiplier+5When the Combo is Three of a Kind, base Combo Multiplier+5When the Combo is Straight, base Combo Multiplier+5When the Combo is Full House, base Combo Multiplier+5When the Combo is Four of a Kind, base Combo Multiplier+5When the Combo is Five of a Kind, base Combo Multiplier+5Crystal Dice showing 1 grants base face value +10Crystal Dice showing 2 grants base face value +10Crystal Dice showing 3 grants base face value +10Crystal Dice showing 4 grants base face value +10Crystal Dice showing 5 grants base face value +10Crystal Dice showing 6 grants base face value +10Crystal Dice showing 1/3/5 grants base face value +5Crystal Dice showing 2/4/6 grants base face value +5When the Combo is High Point, base Combo Multiplier -5When the Combo is One Pair, base Combo Multiplier -5When the Combo is Two Pairs, base Combo Multiplier -5When the Combo is Three of a Kind, base Combo Multiplier -5When the Combo is Straight, base Combo Multiplier -5When the Combo is Full House, base Combo Multiplier -5When the Combo is Four of a Kind, base Combo Multiplier -5When the Combo is Five of a Kind, base Combo Multiplier -5Crystal Dice showing 1 grants base face value -8Crystal Dice showing 2 grants base face value -8Crystal Dice showing 3 grants base face value -8Crystal Dice showing 4 grants base face value -8Crystal Dice showing 5 grants base face value -8Crystal Dice showing 6 grants base face value -8Crystal Dice showing 1/3/5 grants base face value -5Crystal Dice showing 2/4/6 grants base face value -5
Room rewards (pick 1 of 3)
Clear the mobs in a room → 3 rewards are offered, you take one:
Instantly gain 3 Reroll(s) Instantly restore 3 HP
 Choose 1 Crystal Die and change any 1 of its faces to today's recommended face
 This Floor's Boss Max HP -5% (stackable)
 This Floor's Boss skill cooldown +20% (stackable)
 Apply 30% Weakness to this Floor's Boss (stackable)
 Combo Multiplier gained on this Floor +2
 Randomly select and ignore one debuff effect from today's stage mechanics
 On this floor, +25% to your ATK Rate, Movement SPD, and Reload SPD.
 Instantly charge the equipped Slot 1 (Main Battle) Orbital Weapon by 25%.
 Instantly charge the equipped Slot 2 (Vanguard) Orbital Weapon by 25%.
 Instantly charge the equipped Slot 3 (Support) Orbital Weapon by 25%.
Red rewards (risk)
Special red options: you take a debuff on yourself in exchange for a reward.
 Spend 2 HP to instantly gain a random reward (HP cannot drop below 1)
 DMG taken by this Floor's Boss -15% (stackable)
 Reduce your attack speed and reload speed by 20% for the next minute
Crystal Dice (15 types)
Each crystal is one die in combat; up to 6 equipped. 20 grades each — higher grade, stronger effect, and the top grades drop on deep floors. There are 5 effect rungs, unlocking at grades 1 / 5 / 10 / 15 / 20:
- Grade 1Each time you spend a Reroll, total Combo Multiplier +0.2xAt max (20): Each time you spend a Reroll, total Combo Multiplier +50x
- Grade 5After claiming each Room reward, gain 1 extra Reroll(s)At max (20): After claiming each Room reward, gain 3 extra Reroll(s)
- Grade 10Each time you spend a Reroll, base face value +2At max (20): Each time you spend a Reroll, base face value +3
- Grade 15Every 30s in a run: +1 rerolls.At max (20): Every 30s in a run: +2 rerolls.
- Grade 20When rerolling, there is a 30% chance the reroll is not consumed.
- Grade 1Red values in the effects of the adjacent "Left" Crystal all gain an extra +1At max (20): Red values in the effects of the adjacent "Left" Crystal all gain an extra +3
- Grade 5Green values in the effects of the adjacent "Left" Crystal are amplified by 1.5xAt max (20): Green values in the effects of the adjacent "Left" Crystal are amplified by 2x
- Grade 10The base face value provided by the adjacent left Crystal's die is raised to 3× the original.At max (20): The base face value provided by the adjacent left Crystal's die is raised to 8× the original.
- Grade 15When this Crystal is in slot 2, red values in the Left-Side Crystal's effects gain a further +2.At max (20): When this Crystal is in slot 2, red values in the Left-Side Crystal's effects gain a further +3.
- Grade 20While this Crystal sits in slot 2, green values in the left Crystal's effects are multiplied by a further 1.5.
- Grade 1Red values in the effects of the adjacent "Right" Crystal all gain an extra +1At max (20): Red values in the effects of the adjacent "Right" Crystal all gain an extra +3
- Grade 5Green values in the effects of the adjacent "Right" Crystal are amplified by 1.5xAt max (20): Green values in the effects of the adjacent "Right" Crystal are amplified by 2x
- Grade 10The base face value provided by the adjacent right Crystal's die is raised to 3× the original.At max (20): The base face value provided by the adjacent right Crystal's die is raised to 8× the original.
- Grade 15When this Crystal is in slot 5, red values in the Right-Side Crystal's effects gain a further +2.At max (20): When this Crystal is in slot 5, red values in the Right-Side Crystal's effects gain a further +3.
- Grade 20While this Crystal sits in slot 5, green values in the right Crystal's effects are multiplied by a further 1.5.
- Grade 1For each Crystal Die showing 1/2/3, base points of all faces +1At max (20): For each Crystal Die showing 1/2/3, base points of all faces +3
- Grade 5For each Crystal Die showing 4/5/6, total Combo Multiplier +1.5At max (20): For each Crystal Die showing 4/5/6, total Combo Multiplier +1000
- Grade 10For every Crystal Die showing 1/2/3, Total Dice Value +5 upon clearing a stage.At max (20): For every Crystal Die showing 1/2/3, Total Dice Value +20 upon clearing a stage.
- Grade 15For every Crystal Die showing 4/5/6, Dice Combo Total Multiplier +30 upon clearing a stage.At max (20): For every Crystal Die showing 4/5/6, Dice Combo Total Multiplier +200 upon clearing a stage.
- Grade 20For every Crystal Die you have, Total Dice Value +10, Dice Combo Total Multiplier +500.
- Grade 1For each Crystal Die showing 1/3/5, base points of all faces +1At max (20): For each Crystal Die showing 1/3/5, base points of all faces +3
- Grade 5For each Crystal Die showing 2/4/6, total Combo Multiplier +1.5At max (20): For each Crystal Die showing 2/4/6, total Combo Multiplier +1000
- Grade 10For every Crystal Die showing 1/3/5, Total Dice Value +5 upon clearing a stage.At max (20): For every Crystal Die showing 1/3/5, Total Dice Value +20 upon clearing a stage.
- Grade 15For every Crystal Die showing 2/4/6, Dice Combo Total Multiplier +30 upon clearing a stage.At max (20): For every Crystal Die showing 2/4/6, Dice Combo Total Multiplier +100 upon clearing a stage.
- Grade 20For every Crystal Die showing 2/4/6, Dice Combo Total Multiplier +10 upon clearing a stage.

- Grade 1Chance for Crystal Dice to roll 1 increased by 15%At max (20): Chance for Crystal Dice to roll 1 increased by 40%
- Grade 5After clearing a room you may pick one Crystal Die and change any 1 of its faces to 1.
- Grade 10For every Crystal Die showing 1, Combo Multiplier +10.At max (20): For every Crystal Die showing 1, Combo Multiplier +1000.
- Grade 15Each Crystal Die showing 1 grants face value +10At max (20): Each Crystal Die showing 1 grants face value +20
- Grade 20When forming a Combo, if one Crystal Die shows 1, Combo Multiplier +1.5; if two Crystal Dice show 1, Combo Multiplier +1.5x1.5, and so on.

- Grade 1Chance for Crystal Dice to roll 2 increased by 15%At max (20): Chance for Crystal Dice to roll 2 increased by 40%
- Grade 5After clearing a room you may pick one Crystal Die and change any 1 of its faces to 2.
- Grade 10For every Crystal Die showing 2, Combo Multiplier +10.At max (20): For every Crystal Die showing 2, Combo Multiplier +1000.
- Grade 15Each Crystal Die showing 2 grants face value +10At max (20): Each Crystal Die showing 2 grants face value +20
- Grade 20When forming a Combo, if one Crystal Die shows 2, Combo Multiplier +1.5; if two Crystal Dice show 2, Combo Multiplier +1.5x1.5, and so on.

- Grade 1Chance for Crystal Dice to roll 3 increased by 15%At max (20): Chance for Crystal Dice to roll 3 increased by 40%
- Grade 5After clearing a room you may pick one Crystal Die and change any 1 of its faces to 3.
- Grade 10For every Crystal Die showing 3, Combo Multiplier +10.At max (20): For every Crystal Die showing 3, Combo Multiplier +1000.
- Grade 15Each Crystal Die showing 3 grants face value +10At max (20): Each Crystal Die showing 3 grants face value +20
- Grade 20When forming a Combo, if one Crystal Die shows 3, Combo Multiplier +1.5; if two Crystal Dice show 3, Combo Multiplier +1.5x1.5, and so on.

- Grade 1Chance for Crystal Dice to roll 4 increased by 15%At max (20): Chance for Crystal Dice to roll 4 increased by 40%
- Grade 5After clearing a room you may pick one Crystal Die and change any 1 of its faces to 4.
- Grade 10For every Crystal Die showing 4, Combo Multiplier +10.At max (20): For every Crystal Die showing 4, Combo Multiplier +1000.
- Grade 15Each Crystal Die showing 4 grants face value +10At max (20): Each Crystal Die showing 4 grants face value +20
- Grade 20When forming a Combo, if one Crystal Die shows 4, Combo Multiplier +1.5; if two Crystal Dice show 4, Combo Multiplier +1.5x1.5, and so on.

- Grade 1Chance for Crystal Dice to roll 5 increased by 15%At max (20): Chance for Crystal Dice to roll 5 increased by 40%
- Grade 5After clearing a room you may pick one Crystal Die and change any 1 of its faces to 5.
- Grade 10For every Crystal Die showing 5, Combo Multiplier +10.At max (20): For every Crystal Die showing 5, Combo Multiplier +1000.
- Grade 15Each Crystal Die showing 5 grants face value +10At max (20): Each Crystal Die showing 5 grants face value +20
- Grade 20When forming a Combo, if one Crystal Die shows 5, Combo Multiplier +1.5; if two Crystal Dice show 5, Combo Multiplier +1.5x1.5, and so on.

- Grade 1Chance for Crystal Dice to roll 6 increased by 15%At max (20): Chance for Crystal Dice to roll 6 increased by 40%
- Grade 5After clearing a room you may pick one Crystal Die and change any 1 of its faces to 6.
- Grade 10For every Crystal Die showing 6, Combo Multiplier +10.At max (20): For every Crystal Die showing 6, Combo Multiplier +1000.
- Grade 15Each Crystal Die showing 6 grants face value +10At max (20): Each Crystal Die showing 6 grants face value +20
- Grade 20When forming a Combo, if one Crystal Die shows 6, Combo Multiplier +1.5; if two Crystal Dice show 6, Combo Multiplier +1.5x1.5, and so on.

- Grade 1Chance for Crystal Dice to roll 1/3/5 increased by 15%At max (20): Chance for Crystal Dice to roll 1/3/5 increased by 40%
- Grade 5After clearing a room you may pick one Crystal Die and change any 1 of its faces to any of 1/3/5.
- Grade 10For every Crystal Die showing 1/3/5, Dice Combo Multiplier +10.At max (20): For every Crystal Die showing 1/3/5, Dice Combo Multiplier +1000.
- Grade 15Each Crystal Die showing 1/3/5 grants face value +10At max (20): Each Crystal Die showing 1/3/5 grants face value +20
- Grade 20Each Crystal Die showing 1/3/5 grants face value +1.5

- Grade 1Chance for Crystal Dice to roll 2/4/6 increased by 15%At max (20): Chance for Crystal Dice to roll 2/4/6 increased by 40%
- Grade 5After clearing a room you may pick one Crystal Die and change any 1 of its faces to any of 2/4/6.
- Grade 10For every Crystal Die showing 2/4/6, Dice Combo Multiplier +10.At max (20): For every Crystal Die showing 2/4/6, Dice Combo Multiplier +1000.
- Grade 15Each Crystal Die showing 2/4/6 grants face value +10At max (20): Each Crystal Die showing 2/4/6 grants face value +20
- Grade 20Each Crystal Die showing 2/4/6 grants face value +1.5
- Grade 1After claiming each Room reward, gain 1 extra Reroll(s)At max (20): After claiming each Room reward, gain 3 extra Reroll(s)
- Grade 5After claiming each Room reward, total Combo Multiplier +1.5At max (20): After claiming each Room reward, total Combo Multiplier +1000
- Grade 10After claiming each Room reward, you may choose a Crystal Die and change any 1 of its faces to today's recommended faceAt max (20): After claiming each Room reward, you may choose a Crystal Die and change any 2 of its faces to today's recommended face
- Grade 15Clearing a room has a 30% chance to grant an extra reward pick.At max (20): Clearing a room has a 50% chance to grant an extra reward pick.
- Grade 20Each room cleared raises the base multiplier of every combo by 10%.

- Grade 1After claiming each Room reward, total Combo Multiplier +0.5At max (20): After claiming each Room reward, total Combo Multiplier +1000
- Grade 5After claiming each Room reward, total face value +2At max (20): After claiming each Room reward, total face value +5
- Grade 10After claiming each stage reward, total face value + (currently available Crystal Dice count x 5).At max (20): After claiming each stage reward, total face value + (currently available Crystal Dice count x 8).
- Grade 15After claiming each Room reward, the Floor Boss loses 2% of its Max HPAt max (20): After claiming each Room reward, the Floor Boss loses 3% of its Max HP
- Grade 20Upon entering the stage, all monsters in a random Battle Room will be cleared.
Antibodies & weakening
Crystals grant Darktide Antibodies and Energy. Each floor has its own Viral Concentration (the 'Virus' column). If your antibodies are below a floor's viral concentration, your Weakening Level rises — the higher the level, the weaker you are on that floor. Deeper floors have higher virus and need more antibodies.
Missions
The dungeon's missions by family: the numbers are the thresholds inside a family, the icons what they pay (hover a threshold for the exact reward).








The daily families reset every day; the rest count for the whole season.
Floors, virus and rewards
200 floors. Difficulty scales not with battle power but with the floor's virus concentration vs your crystal antibodies — watch the Virus column. Checkpoint floors:
| Floor | Section | Face | Dice | Virus | Rewards |
|---|---|---|---|---|---|
| 1 | Underground Garage | | 2 | — | Base ⭐ ⭐⭐ ⭐⭐⭐ |
| 10 | Underground Garage | | 2 | 762 | Base ⭐ ⭐⭐ ⭐⭐⭐ |
| 20 | Underground Garage | | 2 | 3,650 | Base ⭐ ⭐⭐ ⭐⭐⭐ |
| 30 | Underground Garage | | 3 | 7,940 | Base ⭐ ⭐⭐ ⭐⭐⭐ |
| 40 | Underground Garage | | 3 | 13,070 | Base ⭐ ⭐⭐ ⭐⭐⭐ |
| 50 | Underground Garage | | 4 | 19,770 | Base ⭐ ⭐⭐ ⭐⭐⭐ |
| 60 | Underground Garage | | 4 | 28,960 | Base ⭐ ⭐⭐ ⭐⭐⭐ |
| 70 | Underground Garage | | 4 | 40,040 | Base ⭐ ⭐⭐ ⭐⭐⭐ |
| 80 | Underground Garage | | 4 | 54,690 | Base ⭐ ⭐⭐ ⭐⭐⭐ |
| 90 | Abandoned Metro | | 5 | 71,130 | Base ⭐ ⭐⭐ ⭐⭐⭐ |
| 100 | Abandoned Metro | | 5 | 83,950 | Base ⭐ ⭐⭐ ⭐⭐⭐ |
| 110 | Abandoned Metro | | 5 | 103,070 | Base ⭐ ⭐⭐ ⭐⭐⭐ |
| 120 | Abandoned Metro | | 5 | 125,000 | Base ⭐ ⭐⭐ ⭐⭐⭐ |
| 130 | Abandoned Metro | | 5 | 152,120 | Base ⭐ ⭐⭐ ⭐⭐⭐ |
| 140 | Abandoned Metro | | 5 | 181,340 | Base ⭐ ⭐⭐ ⭐⭐⭐ |
| 150 | Research Center | | 6 | 212,980 | Base ⭐ ⭐⭐ ⭐⭐⭐ |
| 160 | Research Center | | 6 | 251,170 | Base ⭐ ⭐⭐ ⭐⭐⭐ |
| 170 | Research Center | | 6 | 291,600 | Base ⭐ ⭐⭐ ⭐⭐⭐ |
| 180 | Research Center | | 6 | 334,460 | Base ⭐ ⭐⭐ ⭐⭐⭐ |
| 190 | Research Center | | 6 | 378,970 | Base ⭐ ⭐⭐ ⭐⭐⭐ |
| 200 | Research Center | | 6 | 421,190 | Base ⭐ ⭐⭐ ⭐⭐⭐ |
Game rules
- 1. Darktide Crystals were developed by researchers as a means to fight the Darktide Virus. Ordinary people can strengthen their bodies and raise their virus resistance by equipping Crystals, or by dismantling and absorbing them.
- 2. As you progress through Darktide HQ challenge stages, new Darktide Crystal slots will gradually unlock, up to a maximum of 6.
- 3. Battle stages feature a Face Multiplier bonus: the value formed by each die face's points plus its corresponding boosts converts at a set rate into the final Face Multiplier.
- 4. Battle stages also feature a Combo Multiplier bonus: when your Darktide Crystal Dice form a Combo, the equipper's damage output is greatly amplified, and the effects on the Darktide Crystals strengthen the equipper even further.
- 5. Darktide Crystals come in multiple Tiers. Higher-Tier Crystals carry more and stronger boost effects, but can only be found by exploring deeper Floors of the Darktide HQ.